I’ve learned a lot over my years of blogging and I’ve realized that one of the most important components on your blog is photography. It’s what catches a viewer’s eye and sets you apart from the masses. You want your outfit (or whatever you’re highlighting) to be presented in a beautiful way. And a few editing tricks can make all the difference. I don’t spend too much time editing my photos (otherwise that’s all I’d be doing) and never alter/slim my appearance (although I will admit to editing out a spot sporadically as these will be on the internet forever).
As I’ve never been formally trained in Photoshop, I jumped at the chance when Bria asked me to sit in on the Digital Darling Creative’s Photoshop Bootcamp a few weekends ago. Learn this crazy contraption in 2 days? Perfect. The class was incredibly relevant and Bria talked about application, not just the theoretics behind each technique and skill.
Today I’m sharing the steps I now use on all my photos:
(Please bear with me as I am not a teacher!)
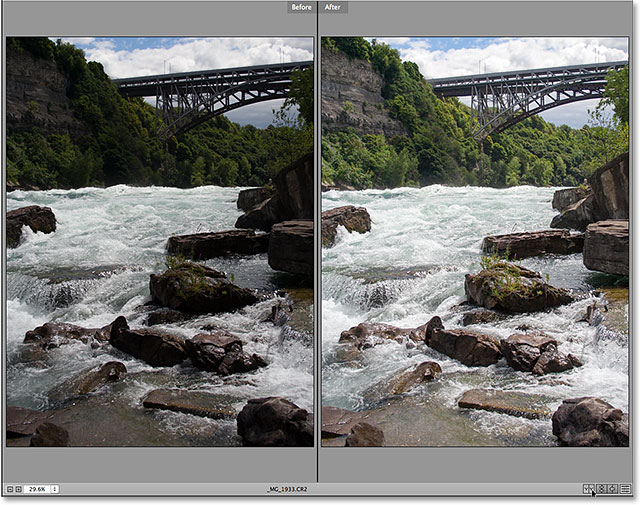
1. LEVELS
I usually auto-adjust to see what Photoshop would do, then I’ll adjust it myself to a point where I’m happy. This only takes about 30 seconds.
2. EXPOSURE
I like my photos to be a bit lighter/brighter so next I increase the exposure, while staying aware of blown-out (overexposed) editing.
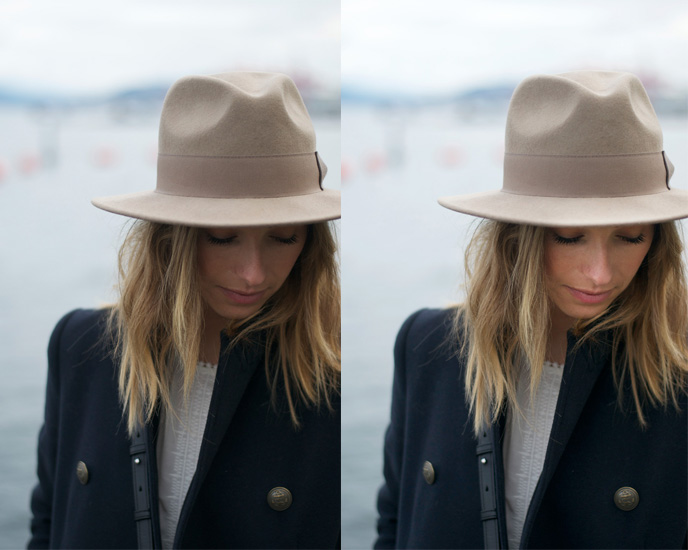
3. BURN/DODGE
This is my favourite trick to lighten or darken a small part in a photo. Sometimes my face (or a clothing piece) will be a bit shadowed and so I’ll use the dodge (lighten) tool on it (usually with a low opacity on the layer). Note: this photo has also been edited with levels
Tip: Always make a duplicate layer of your background to do this on!
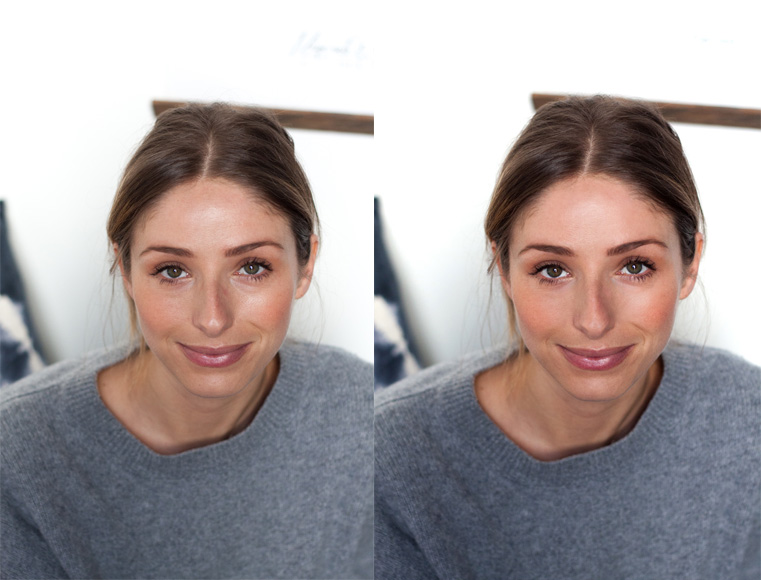
4. CLONE STAMP TOOL
Whether you’re cleaning up your photo background, a wrinkle on your skirt or a spot on your face, the clone stamp tool is a great addition to my lineup (thanks to PS Bootcamp).
Note: this photo has been edited with levels, exposure + colour balance
The next Digital Darlings Creative bootcamp is in May and if you register before April 15th, you can save $105 on your class! Grab a girlfriend (or meet some new ones) and just do it. Highly recommended for everyone from those with absolutely no Photoshop knowledge to us brushing up on our basic skills.
I hope that was helpful for those of you who have been asking about my techniques. If you have any more questions please feel free to comment or email! I’ll answer as best I can (as I am not expert, by any means).
Have a wonderful start to the week, friends!
photos via photoshopessentials.com


Great tips, thanks for the share! I’m especially interested in experimenting with the levels – I never understood histograms very well ❤
munchies&musings
Author
you’re welcome! with histograms i find that auto-adjust is helpful, especially for non-experts (like myself) and then from there just use my own eye to do what I think looks good!
sounds like an awesome class! I’d love to do a class like that at some point 🙂
http://www.andrea-clare.blogspot.com
Author
highly recommended 🙂
Great tips! Thanks for sharing! http://www.earringsandstuff.com
Author
you’re welcome!
Amazing tips!! Thank you for sharing!!
http://www.blondeincashmere.com
Author
my pleasure!
Such great tips! I just got photoshop as a gift but I feel very lost in it so your tips are helpful! It’s too bad I don’t live in Vancouver or I would take this workshop in a heartbeat. Thanks for sharing!
xo, jackie
stylemydreams.wordpress.com
Author
it can be super overwhelming, but small adjustments can make a difference. It can be easy to get lost in all the tools so just use what you know!
This post was really useful because personally I don’t use Photoshop – I don’t know what should I do with my photos.. I’m sure that I’m going to get Photoshop and start edit photos there. Thank you a lot, this was great post!!
http://happinessvictim.blogspot.com
x
Author
you’re very welcome Elizabete, glad it was helpful!
This is really useful! I should start using Photoshop – iPhoto doesn’t always give the best results!
Anne-Sophie x http://www.citycookie.co.uk
Thank you! this is really useful I’m never happy with my images and always looking to improve them, I should try out photoshop!
Aimee x
http://cappuccinointheclouds.co
Author
ya, it’s super helpful and can be quick and easy with just a few quick edits!